Friday, March 27, 2009

What is Natural Modern Country?

So what is the Natural Modern Country look anyway? It's my idea of a comfortable interior space, a mixture of Natural and Modern Country. Other styles may make their way into my decorating, out of the necessity to stay within a very tight budget. It may be interesting however to see what can be done on a (broken) shoestring budget -a sort of experiment.

I decided on this look because the images that most attracted me fell into these two categories. It is very difficult though! I also find myself being drawn to a comfortable Traditional Country (without the hearts). And while the Retro and Mid-Century Modern looks are not my personal favorites it is very possible that a bit of Danish Modern could find it's way in.

Natural is defined in The Home Style Sourcebook as having "warm tones and heavily textured surfaces". It is also eco-conscious in that it uses natural, sustainable, recycled and re-purposed (I love that word) materials.

Modern Country is described in The Home Style Sourcebook as using a "minimalist white palette in which various shades of white are exploited against each other...unusual sculptural objects, once practical...thoughtful mixture of modern and antique objects and furniture, with the emphasis on comfort."

I see Natural Modern Country as being a warmer, eco-conscious version of Modern Country.

Below are a few pics of the Modern Country and then the Natural styles from three of my favorite books, The Natural Home by Judith Wilson, The Home Style Sourcebook by Geddes-Brown, Sorrell & Wilson. and Simple Style by Julie Bird

Modern Country:
The architecture of the room is very country but the bed is dressed in a more modern way and there is a gridded rug on the floor.


This seems to be a cob house, probably in the Southwest of England in County Devon. No telling how long it's been there. A home such as this will stand for hundreds of years. That's the way to build!


This is an idea that I plan to use in my living room. I'll be exchanging my oriental style rug for a jute or sisal one and my heavy, gi-normous mission style coffee table for one that is visually lighter. My ceilings are 12' high plus a skylight and the coffee table really seems to weigh the room down and throw it out of balance.

There was a young lady who wed a philosopher
and all of his books were such a challenge to her!
Spread out here and stacked over there,
these books need a place if this house we will share!

All of my husband's (and daughter's) books are a constant challenge for me. He even has lesser used books stacked to hold shelves to hold more books!

If I could realize something like the picture to the left in my own home a major battle will have been won.

This pic is from Simple Style by Julia Bird.


Natural:

You can really get a sense of warmth from this picture. It's not stuffy though and there are plenty of clean lines .


We have a couple of amazing leather club chairs that my husband purchased from craigslist. I look forward to achieving a more neutral scheme so they will standout.


This bedroom is very white but doesn't feel cold because of the warm color of the tiles, the extra fabric around the bed, the quilt over the table and the natural wood ceiling. It's actually classified as Natural Country in The Natural Home. I can't go this country since mine is an urban abode.
The gingham pillows let you know that this is a rural home.
I think its gorgeous!

These are just a few of the many, many images I am working with. There are a number of great books to help me along. Most of them are checked out from my public library. I use my digital camera to take pictures of my favorites and then build a gallery that I can refer back to.

Friday, March 20, 2009

"New" home, "new" blog

I have a new look. What do you think? The other felt a little busy. The blog didn't feel consistent with my home life so a change was needed!
Just thought I'd include a few pictures from home. They could actually be considered 'before' pics or at least 'in progress' pics. As rooms are finished I'll post before and after pics with comments on how it was done. I will be going for a natural modern country look on a budget. Though I hope the 'on a budget' part won't be noticeable.

We live in an apartment in the city. It's a large space (for which we are very thankful) but it can feel a bit tight at times. All the more reason that it should be restful and well ordered.
For some time after my husband finished his PhD I chose not to pay too much attention to "making a home" because I thought we would buy a house within the near future. The near future is now past and we have not bought a house. But we have come to realize that no matter what sort of structure we may live in, it is our home. So, why should I frustrate myself by suppressing those nesting instincts?
Having also been influenced by A Pattern Language, which speaks strongly against rental situations, I rebelled against our own. Good did come of my reading however. We decided not to treat our apartment like someone else's place but like our home, which it is! My husband and I still plan to buy a house (actually a small farm in the UK with a cob house, cow and sheep...) but in the meantime we'll enjoy making our home together wherever we are. We even have a back deck and a parking space here! For what are we lacking?

Our bathroom cabinet used to have a large retro mirror for a door and it just didn't go so we removed it. Our bedroom closet was dark and the top clothes rail (which used to run across the back) was so high we could hardly reach it! After gutting the closet, we refinished it almost completely with stuff that we already had. I'm planning on hanging a few framed pictures on that back wall. Not what you'd expect, but why not?
My "nesting instinct" grew stronger last spring as I watched a bird building a nest in the rafters of our deck. She flew away and then returned with some find for her new place while decorating my iron chandelier at the same time. It's a year later and officially a new spring. I hope to see her again and be encouraged by her efforts.


Wednesday, March 11, 2009

Bath Mitt Pattern & Pillow

Here are a couple of quick projects that I have been working on over the last couple of weeks.

The first is a pillow knit from humble fisherman's wool. Very simple but, I think, very classic. The idea came from a picture I saw in an European interior design book. Those pillows were of sewn fabric. My version is knit in the round and closes with a simple cotton tie at one end. Because of this, there's no front or back. I plan on making more in different sizes for our sofa, chairs and bedrooms, and I am presently on the lookout for some unique, natural fiber yarn in neutral colors. Preferably worsted or heavy worsted with a decently tight spin. I'm open to suggestions.


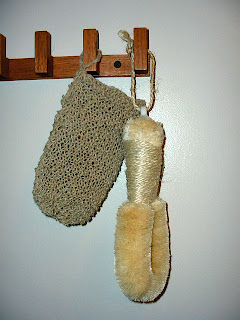
The second project is a very useful bath mitt made of hemp. One of my favorite books is Essential Home by Judith Wilson. In the bath section she shows beautiful pictures of bathrooms with clean white towels, linen hand towels and natural body scrubbers. I found and purchased a version of the body brush and nail brush from an online retailer, the All Natural Products Store. The website is not very inviting and is difficult to navigate but the prices are right. Here's the link: http://www.pacwestserv.com/bathessent01.htm .

(FYI -they also have Lewis Labs' brewer's yeast for a great price in case you were looking for some.)


I decided to make my own bath mitt and picked up a ball of 20 lb Beadsmith Hemp Cord for about $4.50 at the local hobby shop in the bead section. It is stiff to knit with, but there's something about the rough texture that is attractive. I was envisioning an invigorating scrub in the shower as I knitted. That probably helped.


I made a gauge swatch and wrote a simple pattern which you'll find below. If you decide to make one, let me know how it goes or if you find any problems (which there may be some, as this entry was written very late at night).


Hemp Bath Mitt
S/M (M/L)

This takes 4hrs or less to make.

Supplies:


-1 ball 20lb. Hemp Cord
-Size 9 Needles, straight or circular
-Size 9 Needles, double pointed

Body:

CO 32 (36).
K 14 (16) rows in garter stitch.
Place marker 15 (17) sts from each end (on either side of 2 middle sts).
K to marker, K1, M1 twice, K to end. 34 (38) sts
K across row.
K to marker, K1, M1 4 times, K to end. 38 (42) sts
Knit across row.
K to marker, K2, M1 8 times. 42 (46)sts
K across row.
K to marker, hold 8sts (remove markers), K to end. 32 (36) sts.
K 29 (31) rows in garter stitch.
K2, K2tog across row. 24 (27) sts.
K across row.
K across row.
K2tog across row. 8 (9) sts.
Cut yarn leaving enough length to sew up the side of the mitt (about 2.5 times the length of the mitt).
Draw through remaining stitches, pull tight and secure.
Turn mitt inside out and sew side of mitt closed.

Thumb:
Place 12 held thumb stitches on 3 size 9 double pointed needles.
Knit 14 (16) rows garter stitch in the round beginning with a purl row.
K2tog 1 round.
Cut yarn and draw through remaining stitches and secure.

Crochet or braid a small loop at one side of bottom edge to hang your mitt by. If the ends are long enough, use them to make a loop. Secure well.

Weave in all ends.

The mitt will need to be rinsed well in hot water a few times before use. There's something (I don't know what) in the yarn that needs to come out or your mitt will not look very clean after you use it. It also shrinks so if you're unsure about your size, make the larger one.

This pattern fits well but I'm not sure I like how the thumb looks. So you should see an alternative pattern soon with a different thumb.

Thanks for stopping by! Oh yeah, Happy St. Patrick's Day too. (I'll be helping my friend out at her Irish shop this weekend so I thought that was appropriate and I mean it sincerely.)